
With the release of ConfigMgr Current Branch 2103 (and initially in Technical Preview 2102), ConfigMgr sites that utilize HTTP communications are now deprecated and should be configured for HTTPS or Enhanced HTTP. This will appear as a warning during new site installations and site upgrades. Currently, the official support end date for HTTP is the first release after 2022-11-01, which I’d expect to be version 2211 (Removed and deprecated features for Configuration Manager). In this guide, I’m going to go over the process and requirements for converting a ConfigMgr primary site from HTTP to HTTPS-only.
Assumptions:
- You have an existing Active Directory Domain Services infrastructure
- You have an existing ConfigMgr primary site running in HTTP mode
- You have an existing Active Directory Certificate Services infrastructure
- Please check out Chris Kibble’s awesome 7 part series on configuring a Microsoft-based PKI environment! Standing up a Microsoft Certificate Authority
- Overview
- Configuring & Deploying Client Certificates
- Configuring & Deploying Server Certificates
- Configuring & Deploying the DP/Boot Media Client Certificate
- Installing a Fallback Status Point (optional, but recommended)
- Configuring ConfigMgr Roles for HTTPS
- Initial Verification
- Configuring Site Communication Mode
- Final Verification & Additional Notes
Overview
As mentioned above, I’m making assumptions that you have a running AD domain, CM site, and PKI environment already. All of the screenshots and examples below will be from my lab environment, which consists of a single DC also running AD CS as a single-tier enterprise root CA, and a CM primary site server, running the Management Point (MP), Distribution Point (DP), Software Update Point (SUP), State Migration Point (SMP), and Reporting Services Point (RSP) roles. In a production environment, I’d typically expect to see all of these CM roles dispersed among many servers, including running multiple instances of some roles. I will make note of when some things may need to be completed on each specific node or within the CM console/PowerShell.
Lab names that may be referenced:
- donutsdc01a.donuts.ajf8729.com – Domain Controller & Root CA
- donutscm01.donuts.ajf8729.com – ConfigMgr Primary Site Server
- DONUTS ROOT CA – Enterprise Root CA Name
Configuring & Deploying Client Certificates
Before moving into anything CM related, configuring and deploying a certificate template for endpoints to auto-enroll a client authentication certificate is critical. For this, we will duplicate the builtin “Workstation Authentication” template, customizing it as needed, and configuring Group Policy to enable endpoints to auto-enroll a certificate.
This section may not be necessary to complete. If you have already deployed client authentication certificates for another purpose, such as a VPN solution, the existing certificates will most likely work for ConfigMgr. Verify using the PKI Certificate Requirements Documentation. If so, continue down to the next section, Configuring & Deploying Server Certificates.
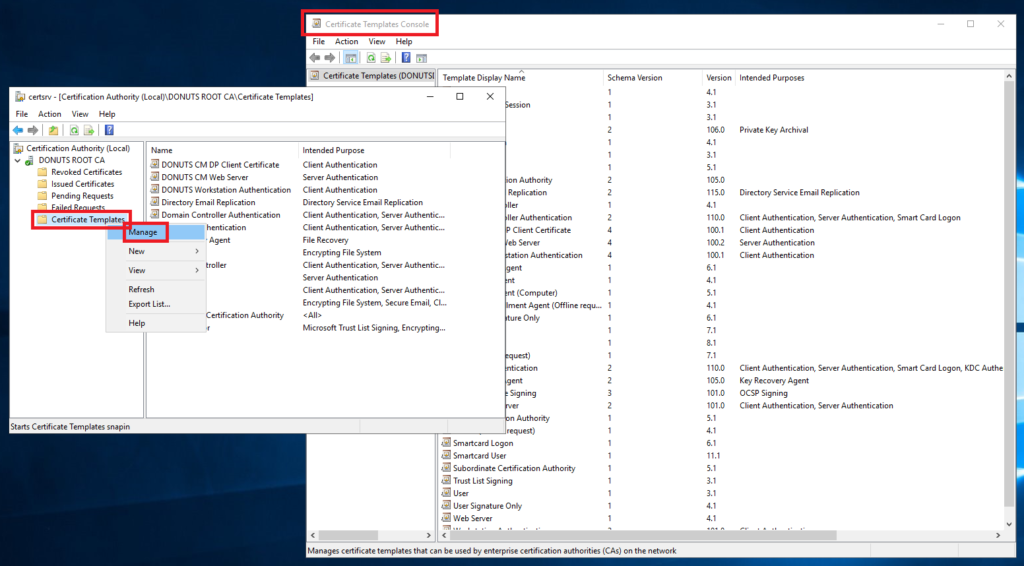
In the Certification Authority MMC, under your CA, right-click Certificate Templates > Manage, to bring up the Certificate Templates Console window. Right-click the “Workstation Authentication” template and click “Duplicate Template”.
From here, customize the new template as follows:
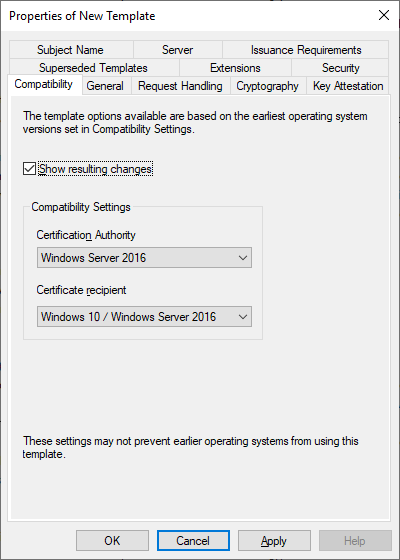
- Raise the compatibility settings to the highest options your environment can support (in my case, Windows 10 and Windows Server 2016).
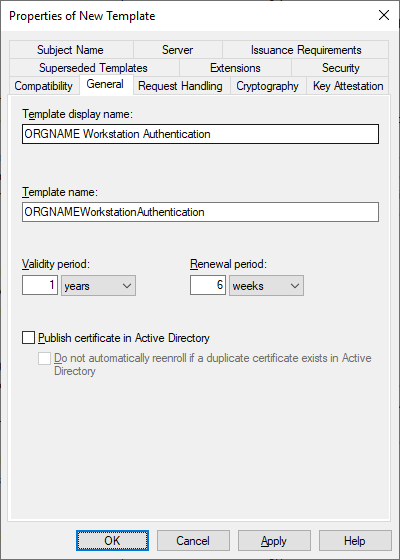
- Rename the template to something that best suits your environment. I prefer to use “ORGNAME Workstation Authentication” to differentiate custom templates built from builtin templates.
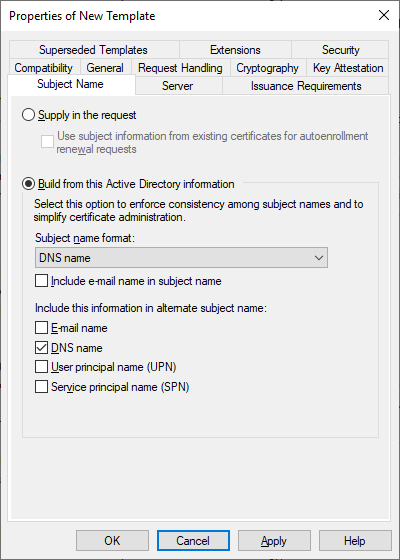
- Configure the Subject Name settings to build from AD, using the DNS name for both subject name and subject alternative name (SAN).
- Under the security tab, configure the Domain Computers group to have “enroll” and “auto-enroll” permissions. Remove your own account that was pre-added for cleanliness.

- Cryptography settings can stay as default. While a 4096-bit key length appears to work in my testing, CM documentation specifies a maximum of 2048, which should already be set.
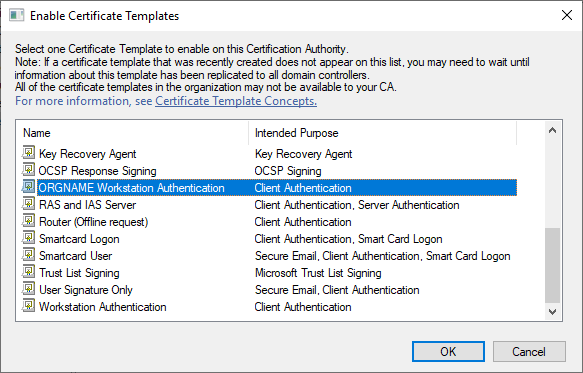
- Click OK to save the new template, close the Certificate Templates Console window, and back in the CA MMC, right-click Certificate Templates again, and click New > Certificate Template to Issue. Select your newly created template, and click OK.
Now that we have our newly created template ready to go, we’ll configure a GPO to enable certificate auto-enrollment across all non-DC endpoints. In my lab, I have everything contained under a single top-level OU under the root of the domain, so this is where I will create and link the policy.
- Create a new GPO, or edit an existing one, as needed, and browse to Computer Configuration > Policies > Windows Settings > Security Settings > Public Key Policies.
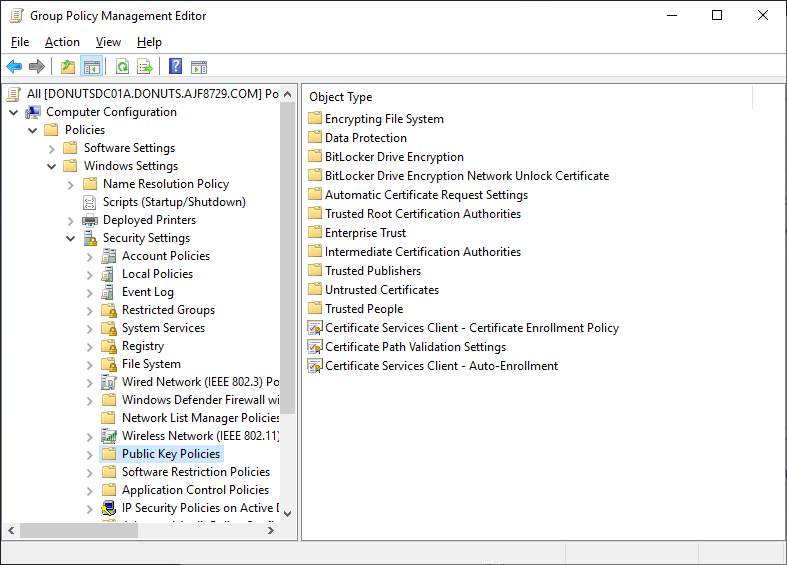
- Open the “Certificate Services Client – Auto-Enrollment” setting, and enable it, checking the two boxes to enable renewal and updating.

- Close the GPO, and on an endpoint, run
gpupdatefollowed bycertutil -pulseas an administrator, and a new certificate should be listed under the personal certificate store. This can be verified by runningcertlm.mscand expanding the Personal certificate store.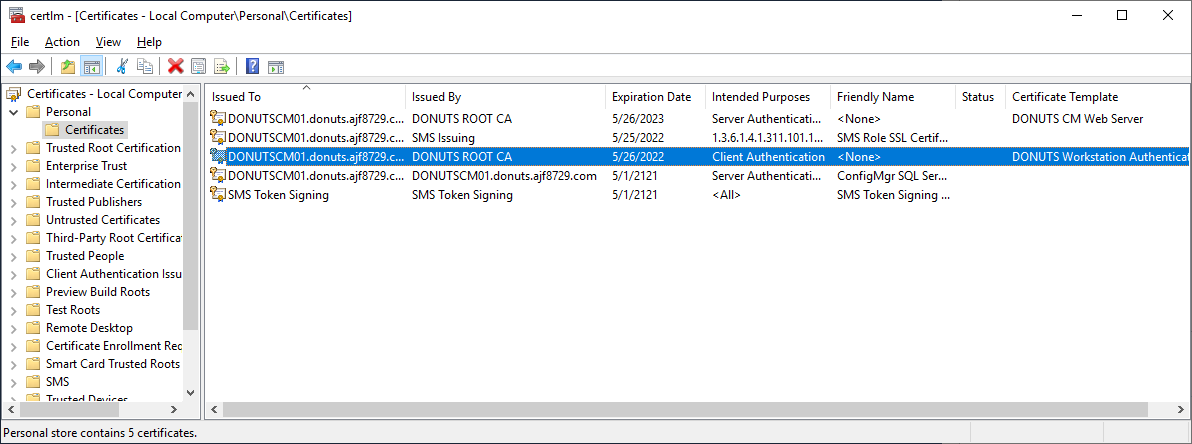
- As other endpoints update to this new policy, they will all begin to enroll certificates. You can monitor enrollments and failures within the CA MMC console.
Configuring & Deploying Server Certificates
Now that we have all endpoints auto-enrolling client authentication certificates successfully, we need to turn our attention towards the server authentication certificates that will be necessary on all CM site system servers that run IIS. This includes MPs, DPs, SUPs, and SMPs, among others (a full list can be found here: PKI certificate requirements for Configuration Manager). RSPs will also need a server authentication certificate. All of these can be configured with a single purpose-built template and auto-enrolled for ease of management, especially on DPs running Server Core.
Before continuing, create a new AD group to contain all of the CM servers that run the roles mentioned above and populate it. This will be used when configuring the template permissions.
Similar to the client certificate configuration, we will clone an existing template, this time, the Web Server template, and configure it as follows:
- Raise the compatibility settings to the highest options your environment can support (in my case, Windows 10 and Windows Server 2016).
- Rename the template to something that best suits your environment. I prefer to use “ORGNAME CM Web Server” to differentiate custom templates built from builtin templates.
- Configure the Subject Name settings to build from AD, using the DNS name for both subject name and subject alternative name (SAN).
- Under the security tab, configure the group you created above to have “enroll” and “auto-enroll” permissions. Remove your own account that was pre-added for cleanliness.
- Cryptography settings can stay as default. While a 4096-bit key length appears to work in my testing, CM documentation specifies a maximum of 2048-bit, which should already be set.
- Click OK to save the new template, close the Certificate Templates Console window, and back in the CA MMC, right-click Certificate Templates again, and click New > Certificate Template to Issue. Select your newly created template, and click OK.
- On your CM server(s), run
gpupdateandcertutil -pulseas administrator, and verify that the server auth certificates have successfully auto-enrolled usingcertlm.msc.
Configuring & Deploying the DP/Boot Media Client Certificate
Distribution points configured to use HTTPS-only require an additional certificate to be configured within DP properties. This certificate is NOT the same as the server authentication certificate. This needs to be a “generic” client auth certificate and is used as a “bootstrap” mechanism for PXE booted clients, as well as clients booted via TS boot media, to initially communicate with CM infrastructure while running a task sequence.
I have seen and heard of some instances where it’s recommended to use a dual-purpose client and server authentication certificate for IIS and in DP properties. This is bad idea. The client authentication certificate specified here is given to every client that PXE boots, and is embedded within all created boot media, with the private key, by design. I recommend that this certificate be given a shorter lifetime and rotated frequently. All DPs can use the same certificate, and rotation can be easily automated. Check out Automating ConfigMgr Distribution Point Client Authentication Certificate Rotation for more details.
We’ll create this template by also duplicating the Workstation Authentication template, but it will require some additional configuration.
- Raise the compatibility settings to the highest options your environment can support (in my case, Windows 10 and Windows Server 2016).
- Rename the template to something that best suits your environment. I prefer to use “ORGNAME CM DP Client Certificate” to differentiate custom templates built from builtin templates.
- Under Request Handling, enable the option “Allow private key to be exported”.
- Change the Subject Name settings to “Supply in the request”.
- For Security settings, there’s a few ways to go. My default stance is to grant CM Full Admins and OSD Admins “enroll” permissions. You can also enable CA manager approval under Issuance Requirements to secure it a bit more. Since we need to leave the SN/SAN fields open, you really want to restrict who can enroll a certificate using this template.
- Cryptography settings can stay as default. While a 4096-bit key length appears to work in my testing, CM documentation specifies a maximum of 2048-bit, which should already be set.
- Click OK to save the new template, close the Certificate Templates Console window, and back in the CA MMC, right-click Certificate Templates again, and click New > Certificate Template to Issue. Select your newly created template, and click OK.
Now that this template has been created, anyone that has been granted access can manually enroll it.
- From a CM server such as the primary site server or a DP, open
certlm.msc, expand Personal, right-click Certificates, and click All Tasks > Request New Certificate. - Click Next twice, and you should see the new template listing, along with a note saying “more information is required”. Check the template and click the note to supply the information.
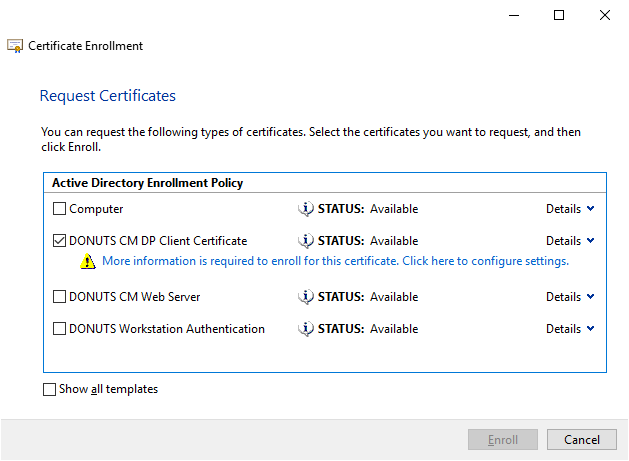
- For subject name, select common name, and enter a “generic” name. I typically use something like the template name and the current date, i.e. “ORGNAME CM DP Client Certificate 2021.05.26”. For alternative name, select directory name, and enter the same name as above, but prefixed with “CN=”.

- Under the General tab, enter the same name as above in the friendly name field.
- Click OK, and click enroll. Depending on how you configured the template security, it will either enroll successfully, or require a CA administrator to approve it in the CA MMC console.
- Click Finish, and you should now see the new certificate in the window.
We now need to export the certificate with the private key, and delete it from the server, as it no longer needs to exist in the local certificate store.
- Right-click the certificate and click All Tasks > Export.
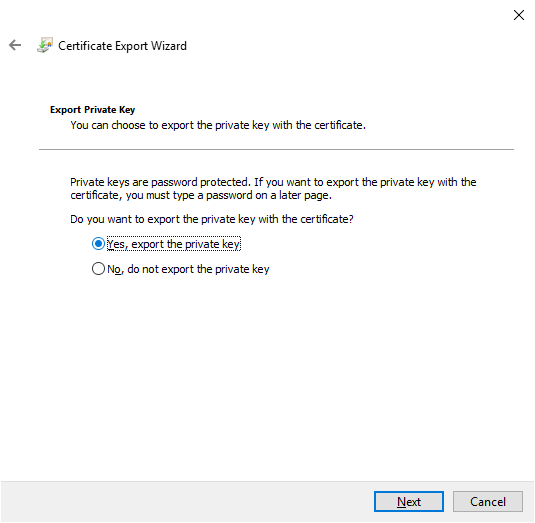
- Click Next, select Yes, export the private key, and click Next.
- Click Next in export file format.
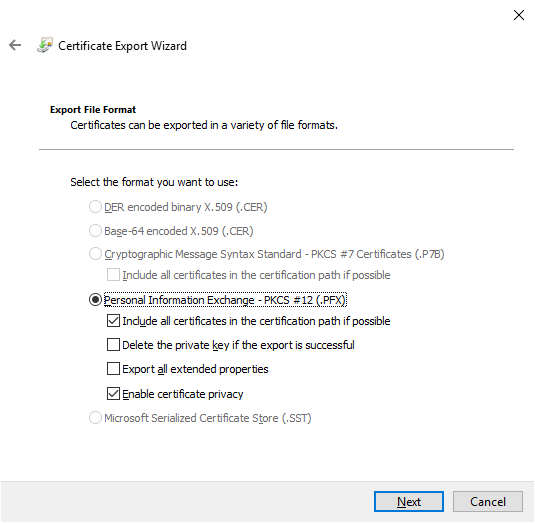
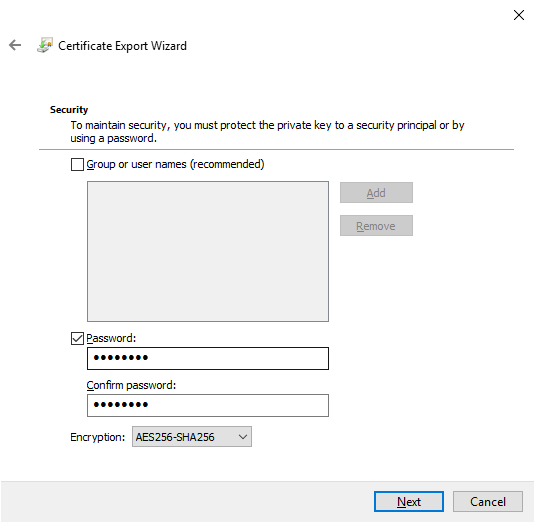
- Check Password, and enter a randomly generated password and store that password securely. Change encryption to AES256-SHA256, and click Next.
- Save the file to a central location that you can access easily.
- Once complete, right-click the certificate in the MMC and click delete.
Installing a Fallback Status Point (optional, but recommended)
A Fallback Status Point is useful in an HTTPS-only environment, as it is used to monitor client deployment and help identify clients that cannot communicate with their MP. The FSP operates over HTTP by design. The FSP is a lightweight role needing minimal IIS components to install. You can find more information about the role here:
Adding an FSP to an existing site system server is very straightforward. As you can only have one FSP within a site, I recommend putting it on its own server, or colocating it with other single-instance roles on a single server.Add-CMFallbackStatusPoint -SiteSystemServerName "servername.domain.tld"
Configuring ConfigMgr Roles for HTTPS
Now that all of the certificate template configurations are complete, we need to configure HTTPS bindings on all of the CM servers running IIS. This will all be done via PowerShell. The following should be run on each server hosting a CM role that utilizes IIS.
- Remove any existing HTTPS bindings:
Get-WebBinding -Protocol https | Remove-WebBindingRemove-Item -Path IIS:\SslBindings\* - Find the thumbprint of the server authentication certificate issued to the server. This example should work in most cases, but YMMV and you may need to do some more filtering. Verify that
$Thumbprintcontains a single certificate thumbprint before continuing.$Thumbprint = Get-ChildItem -Path Cert:\LocalMachine\My\ | Where-Object -FilterScript {($_.EnhancedKeyUsageList -like "*Server Authentication*") -and ($_.Issuer -like "*YOUR CA NAME HERE*")} | Select-Object -ExpandProperty Thumbprint - Create new HTTPS bindings for the appropriate site(s). The Default Web Site will cover all roles except SUPs; those will need the WSUS Administration site configured:
New-WebBinding -Name "Default Web Site" -Protocol https -Port 443 -IPAddress *New-WebBinding -Name "WSUS Administration" -Protocol https -Port 8531 -IPAddress * - Assign the certificate to the HTTPS bindings as needed:
For MP/DP/SMP servers:Get-Item -Path "Cert:\LocalMachine\My\$Thumbprint" | New-Item -Path IIS:\SslBindings\0.0.0.0!443
For SUP servers:Get-Item -Path "Cert:\LocalMachine\My\$Thumbprint" | New-Item -Path IIS:\SslBindings\0.0.0.0!8531 - You should now be able to browse to https://servername.domain.tld and/or https://servername.domain.tld:8531 and confirm that everything checks out.
Once all sites are confirmed to be accessible over HTTPS, we can begin to enable HTTPS on the roles themselves. Making some of these changes can take some time. For example, enabling HTTPS on an MP will reinstall the MP role, so preparing an order for doing things will help reduce any issues on existing managed endpoints.
- Enable use of certificates for site communication (this will not enforce their use, just enable use if a valid certificate is available):
Set-CMSite -SiteCode PS1 -UsePkiClientCertificate $true - Add your Root CA Certificate to the site:
- Under Administration > Site Configuration > Sites, right-click your site, and click Properties.

- Under the Communication Security tab, click Set at the bottom.
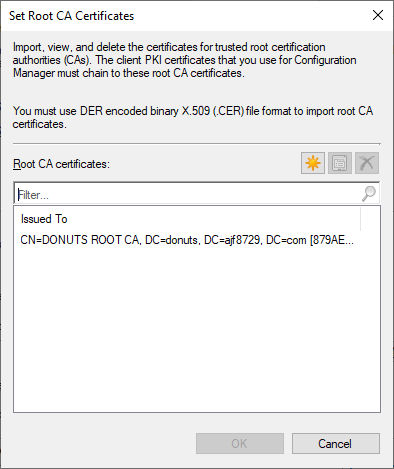
- In the Set Root CA Certificate window, add a cer file exported from your root CA, or a client that has it in its Trusted Root Certificate Authority store.
- Click OK twice.
- Under Administration > Site Configuration > Sites, right-click your site, and click Properties.
- Enabling HTTPS on Management Points (perform this for each MP in your site):
Set-CMManagementPoint -SiteSystemServerName "servername.domain.tld" -EnableSsl $true - Enabling HTTPS on Distribution Points (perform this for each DP in your site) (this command will prompt you to enter the password for the supplied PFX file that you exported earlier):
Set-CMDistributionPoint -SiteSystemServerName "servername.domain.tld" -ClientCommunicationType Https -CertificatePath "\\Path\To\PFX\File.pfx" -CertificatePassword (Read-Host -Prompt "Enter PFX Password" -AsSecureString) - Enabling HTTPS on Software Update Points (perform this for each SUP in your site):
Set-CMSoftwareUpdatePoint -SiteSystemServerName "servername.domain.tld" -EnableSsl $true
This is also a good time to configure the Reporting Services Point (RSP) to use HTTPS. This configuration will need to be completed within the Report Server Configuration Manager console.
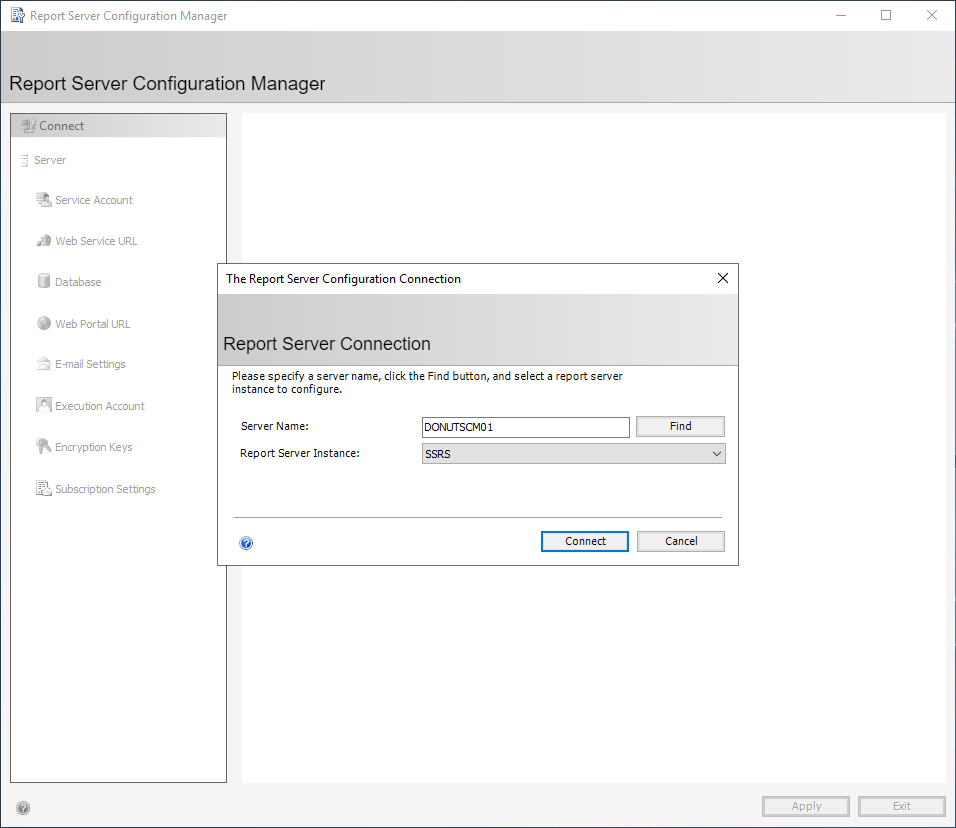
- Launch Report Server Configuration Manager on your server hosting the RSP and SQL Server Reporting Services (SSRS), select your SSRS instance and click Connect.
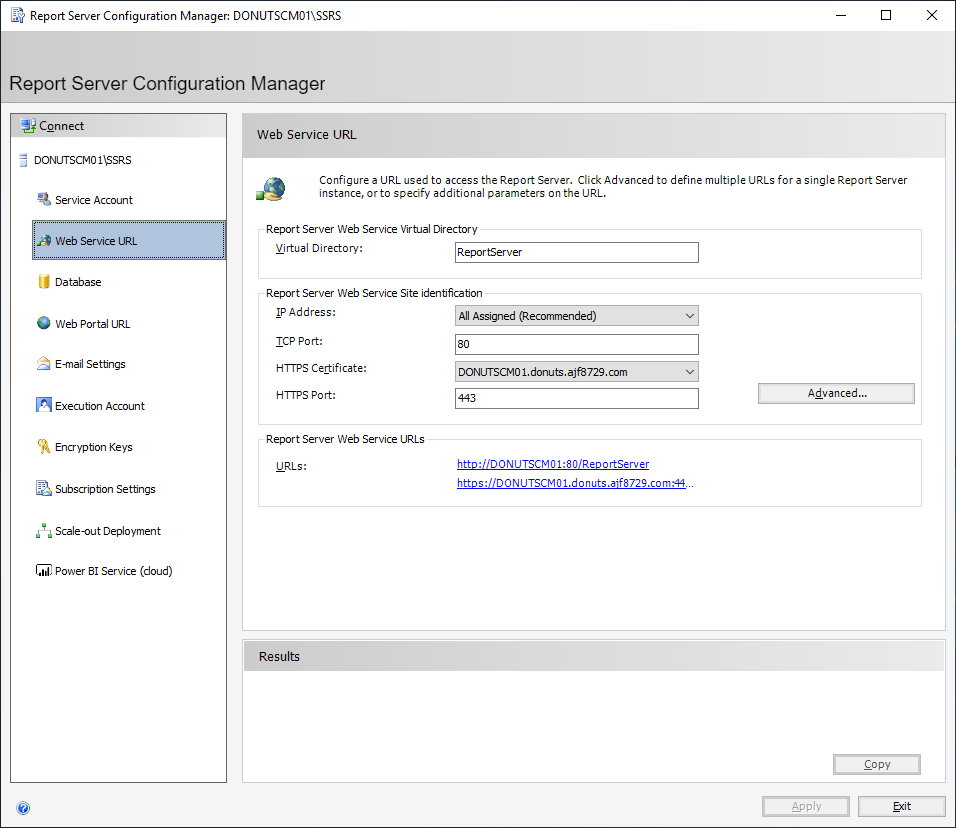
- On the left-hand side menu, click Web Service URL. In the HTTPS Certificate dropdown, select your certificate, and click Apply.
- You may receive a message stating the URL reservation was overridden. This is not actually an issue, and can occur if your RSP is colocated on a server also running IIS, such as an MP.
- Confirm the Web Service is accessible via HTTPS by browsing to https://servername.domain.tld/ReportServer.
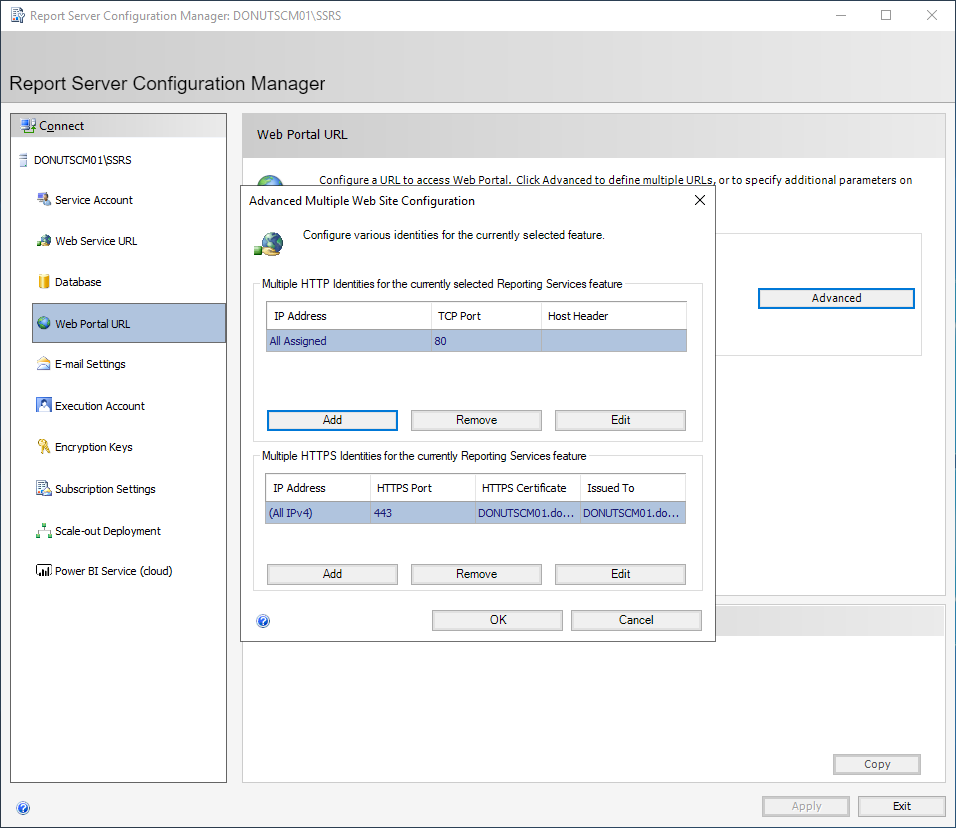
- Back in Report Server Configuration Manager, select Web Portal URL on the left-hand side menu, and click Advanced. In the lower HTTPS section, click Add, select your certificate, and click OK twice.
- Confirm the Web Portal is accessible via HTTPS by browsing to https://servername.domain.tld/Reports.
Initial Verification
Once things start to settle down after configuring roles to use HTTPS, you should start seeing devices switch to “PKI” in the Client Certificate column under Assets and Compliance. At this point, you now have endpoints successfully communicating to your CM site via HTTPS. Even though endpoints can communicate via HTTPS now, they can still fallback to HTTP if there are any issues. Before moving forward with configuring the site to function in HTTPS-only mode, this is a good time to validate some basic functionality such as the following:
- Application installation
- Software update scans
- Software update synchronization
- Operating system deployment via PXE and/or boot media (remember to create new boot media using the exported PFX that you configured DPs with)
- Reporting Services functionality
Configuring Site Communication Mode
Once you have validated functionality to your desired amount, the final step is to configure the site for HTTPS-only mode, which is easily done via PowerShell:Set-CMSite -SiteCode SITECODE -ClientComputerCommunicationType HttpsOnly
Final Verification & Additional Notes
Congratulations! Your ConfigMgr primary site is now configured to run in HTTPS-only mode! At this point, it’s a good idea to continue to monitor site and component status to confirm that everything is functioning as expected.
At this point, you may or may not be able to remove your Network Access account(s) from use. Moving to HTTPS negates the use of an NAA, except for when accessing package shares during OSD prior to domain join. The most common use of this is applying a WIM directly from a distribution point. If you make use of this feature in your task sequences, you may need to think about changing if you want to remove all Network Access accounts from your environment.
If issues do arise, one of the first things you can do to roll back is to allow HTTP communication again briefly in order to allow clients to revert to HTTP if HTTPS is failing, giving you time to troubleshoot while leaving things in a functional state.
Set-CMSite -SiteCode SITECODE -ClientComputerCommunicationType HttpsOrHttp
From here, the first place to start investigating is the various log files stored on clients and servers. A full list of log files, their purposes, and locations can be found here: Log File Reference.
Once any issues are ironed out, the same command can be run to place the site back into HTTPS-only mode.

Hello Anthony, just one question regarding PKI and workgroup SCCM clients. What is the best and efficient way to deploy SCCM client certificates to workgroup computers (computers not part of local domain, dmz computers, etc.)?
I’ve honestly never had to deal with it at scale, so I am unsure. For the few I have, I had a custom client auth template with key export allowed, and then I would request the cert, export as pfx, then import on the workgroup client. In Entra ID joined context, you can achieve this by issuing certs via PKCS or SCEP/NDES, not sure if similar would work for truly standalone clients, still likely need to put hands on each one to configure them.
Hi,
The Microsoft docs say to use “Server 2003” for the cert template compatibility setting. Did you run into any issues setting it higher? I haven’t been able to find any other resources online which say that a higher setting is supported. Thanks!